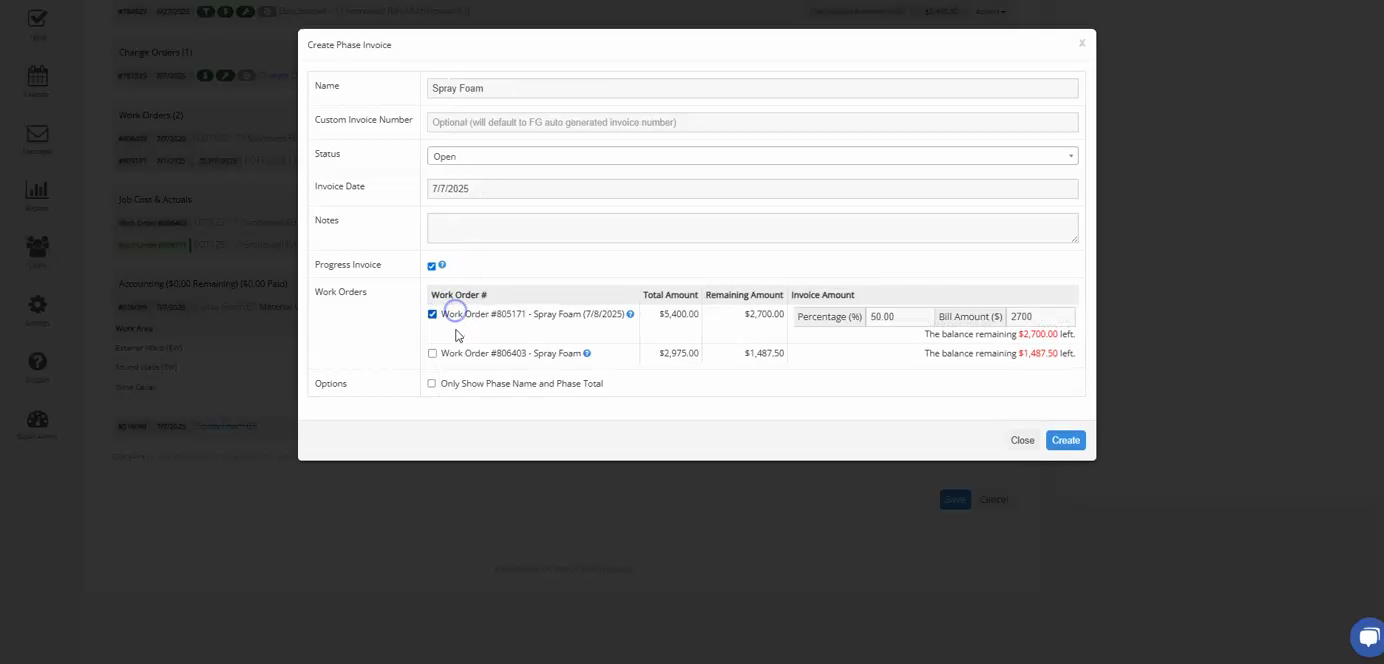
Step 1: Start by selecting the completed work orders for which you want to create a progress invoice. In this case, we're dealing with two work orders - one with a change order and the other with regular work.
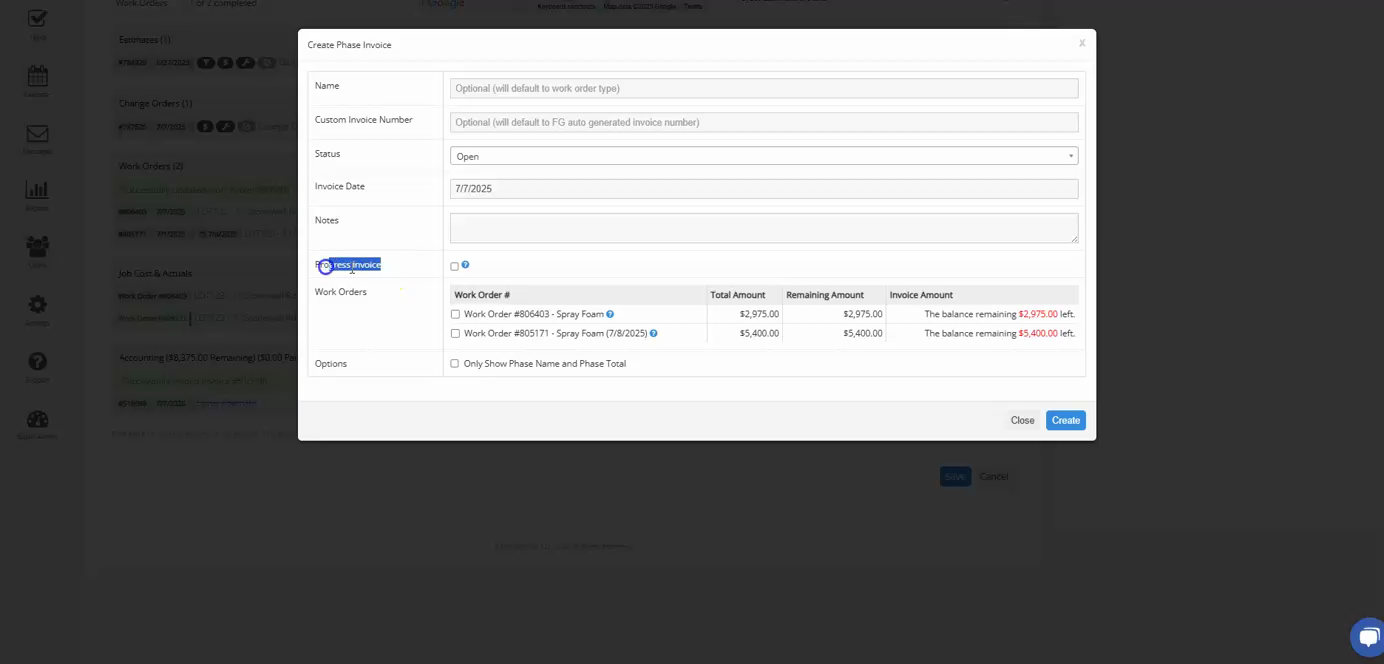
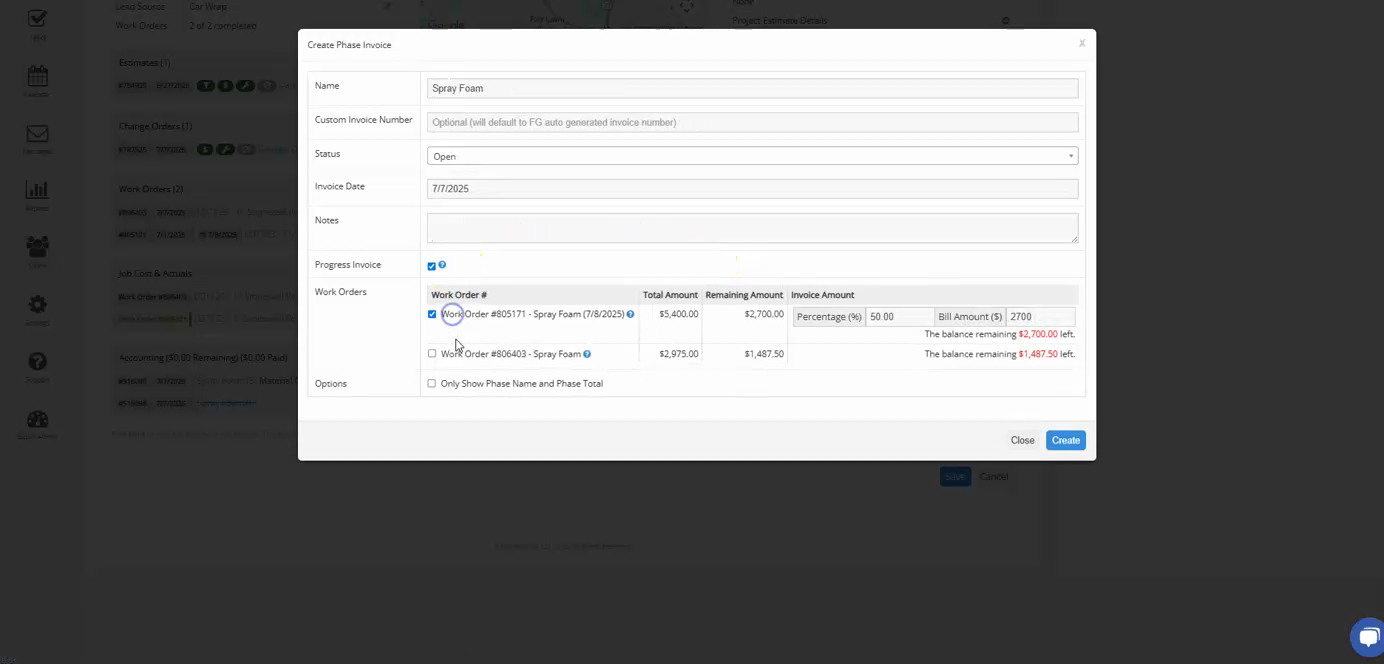
Step 2: Click on the progress invoice button. Select both work orders.
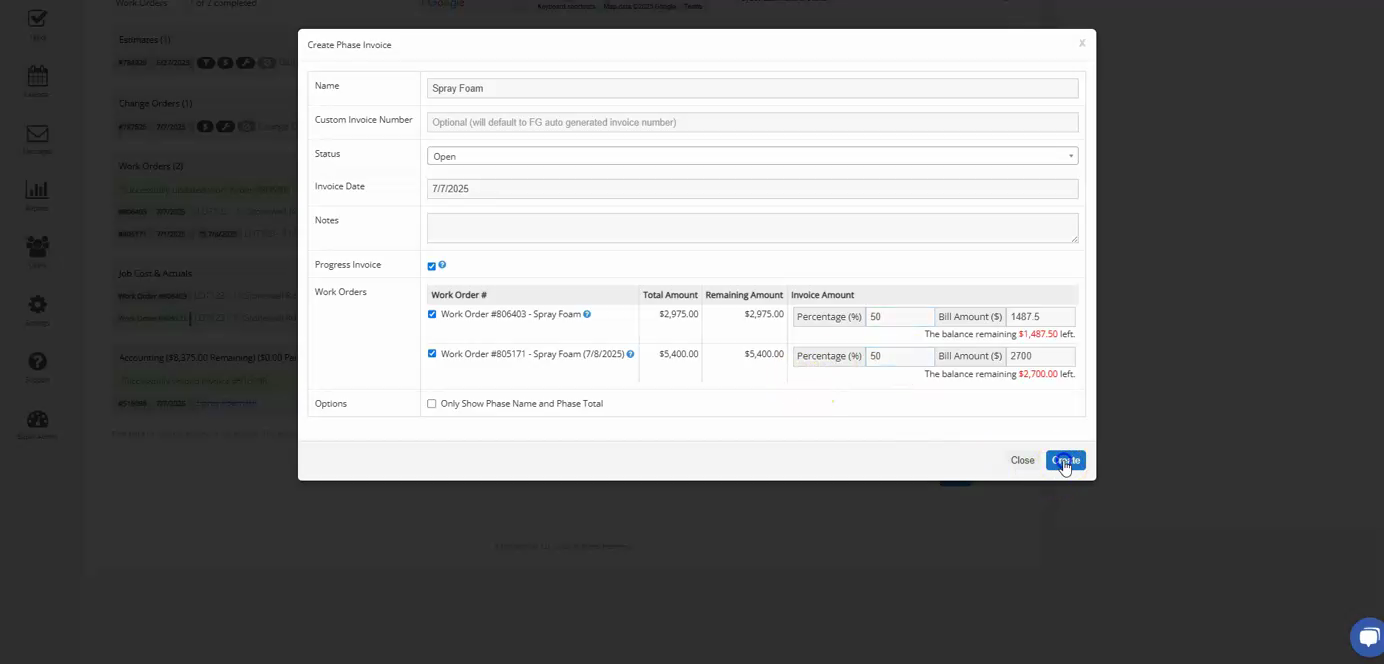
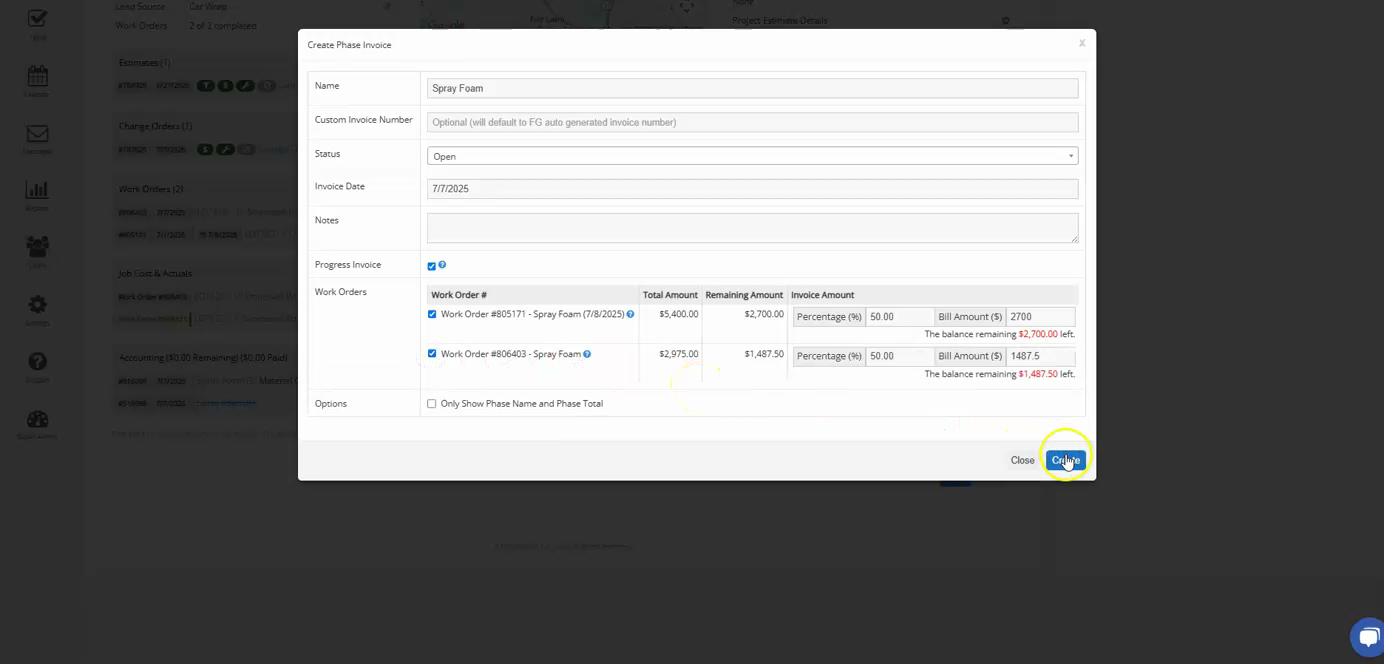
Step 3: Since the client cannot pay the full amount at once, we'll take 50% payment for both work orders. After entering the amounts, click on create.
Step 4: Now, when you view the newly created invoice, you'll notice a smaller total. This is because it's 50% of the total of both work orders.
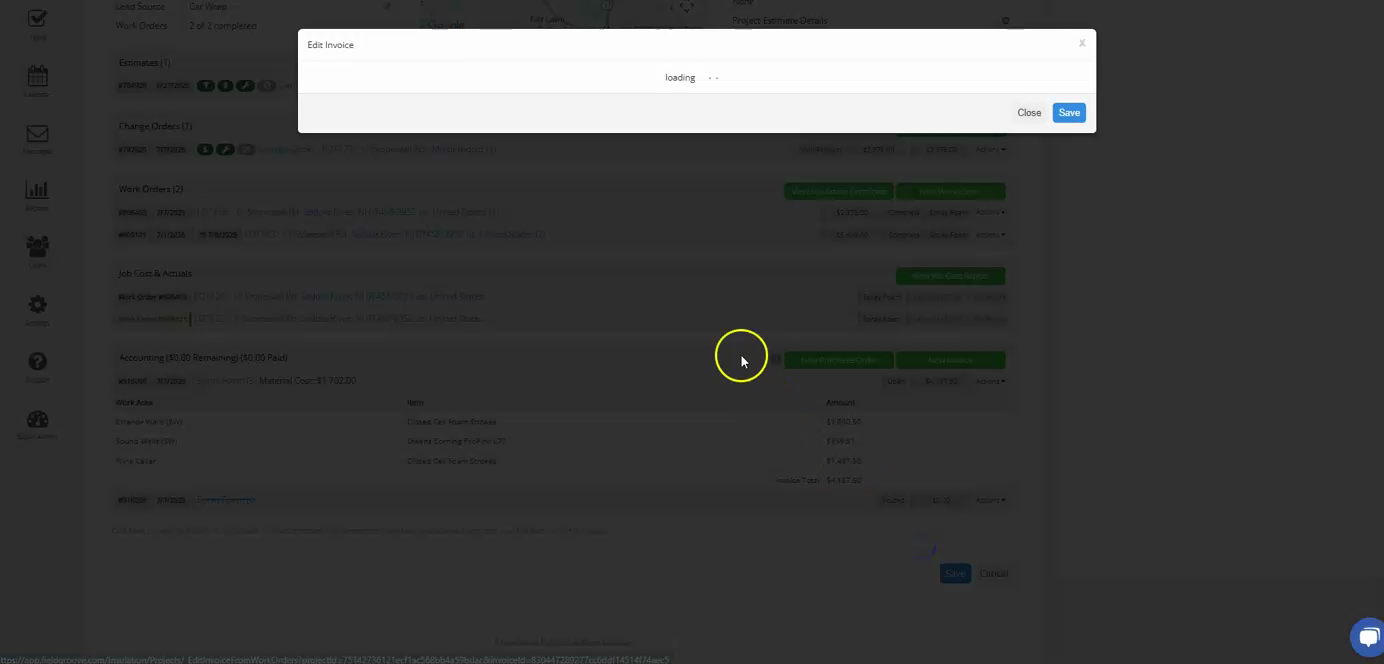
Step 5: If you want to edit the invoice, you can see the totals we've sent out for each work order.
Step 6: To create an invoice for the remaining balance, click on new, then select make progress.
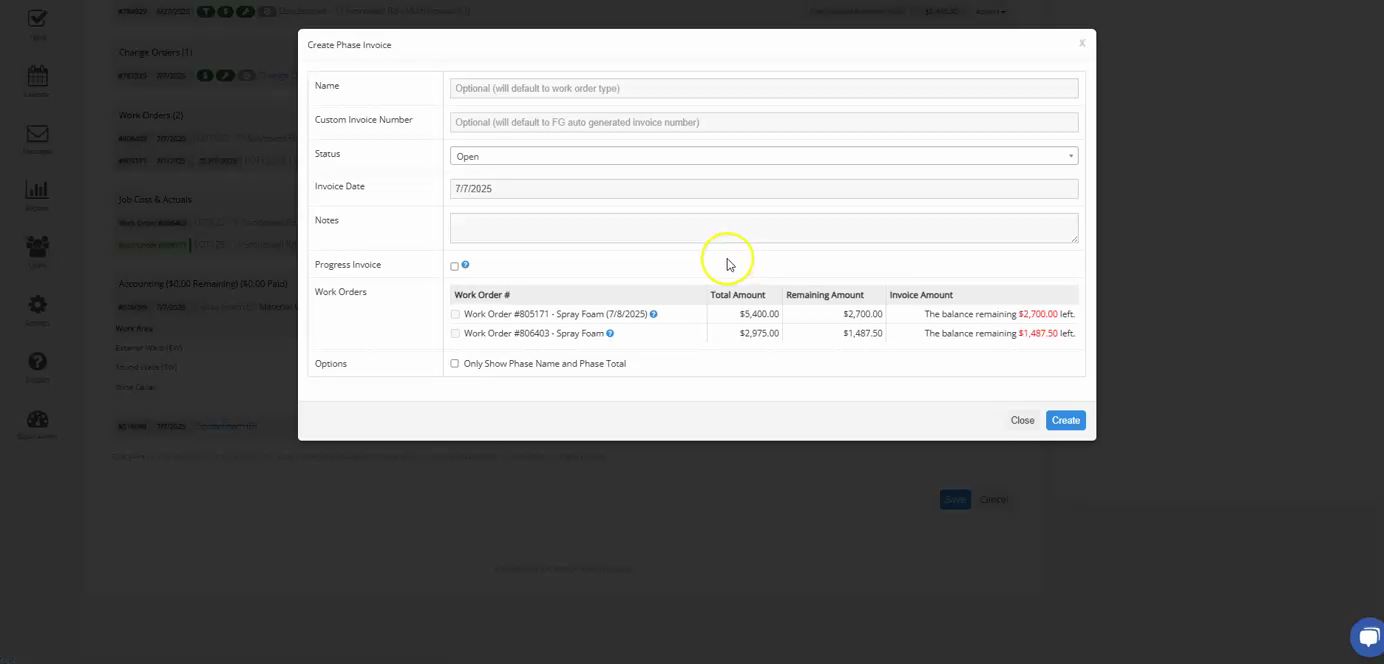
Step 7: Choose the two work orders again.
Step 8: To create an invoice for the remaining balance, select both work orders again and press create. Now, you'll have two invoices, each representing 50% of the total amount.
Step 9: If you've received any payment, you can apply it by clicking on payment, then add
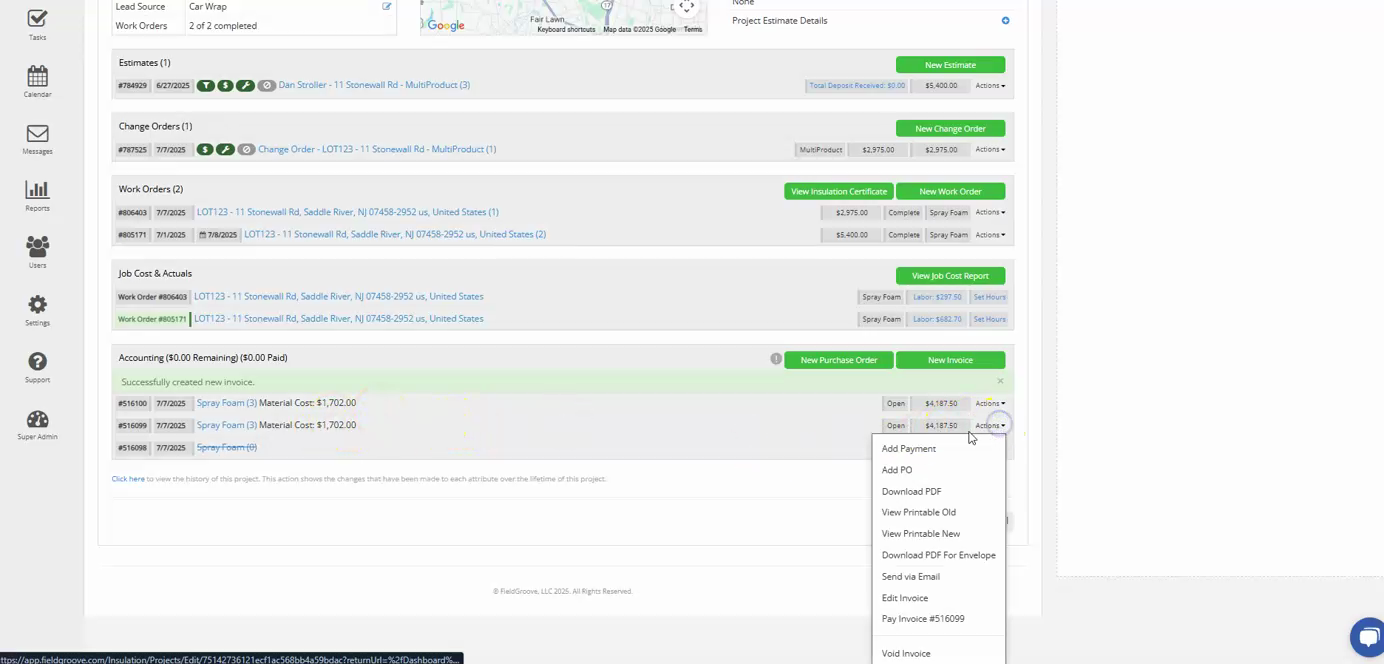
payment, then add payment. Enter the payment amount twice, in this case, 4187.50.
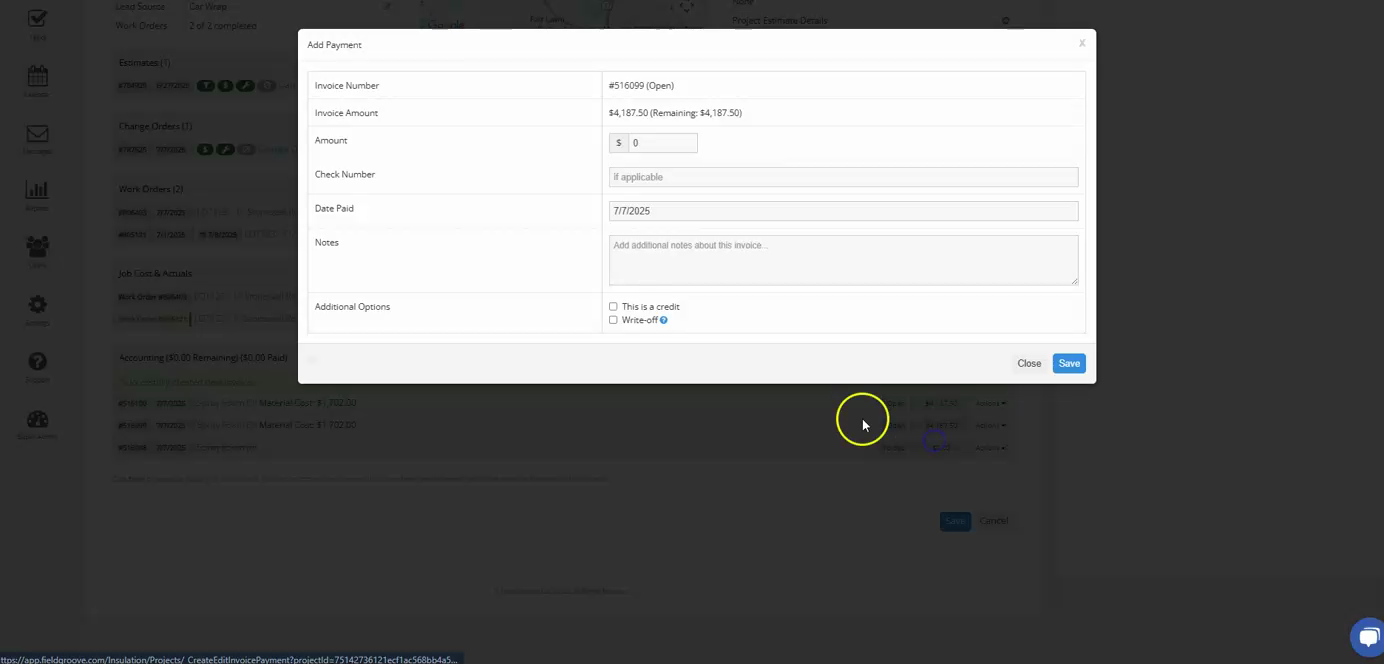
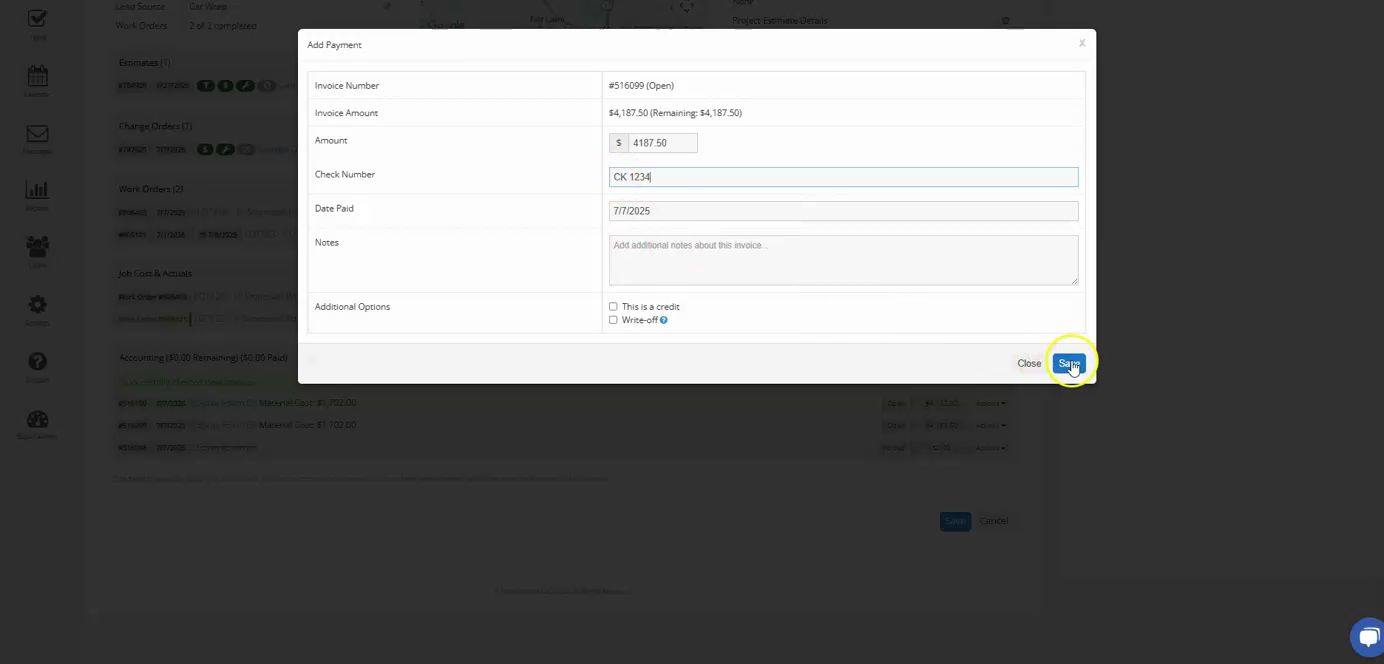
Step 10: You can also add notes and a check number. After entering these details, click on save.
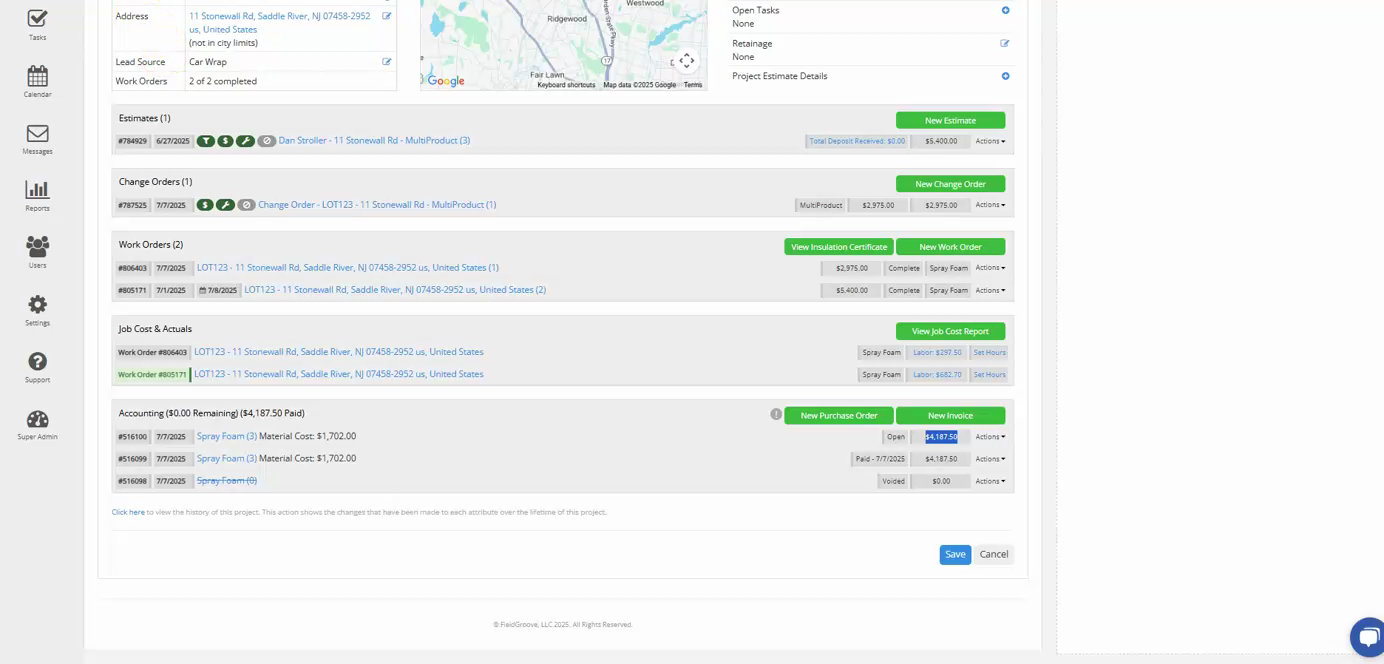
Step 11: Now, you'll see that one invoice has been paid in full and the balance owed is displayed for the other invoice.
And that's how you create a progress invoice!